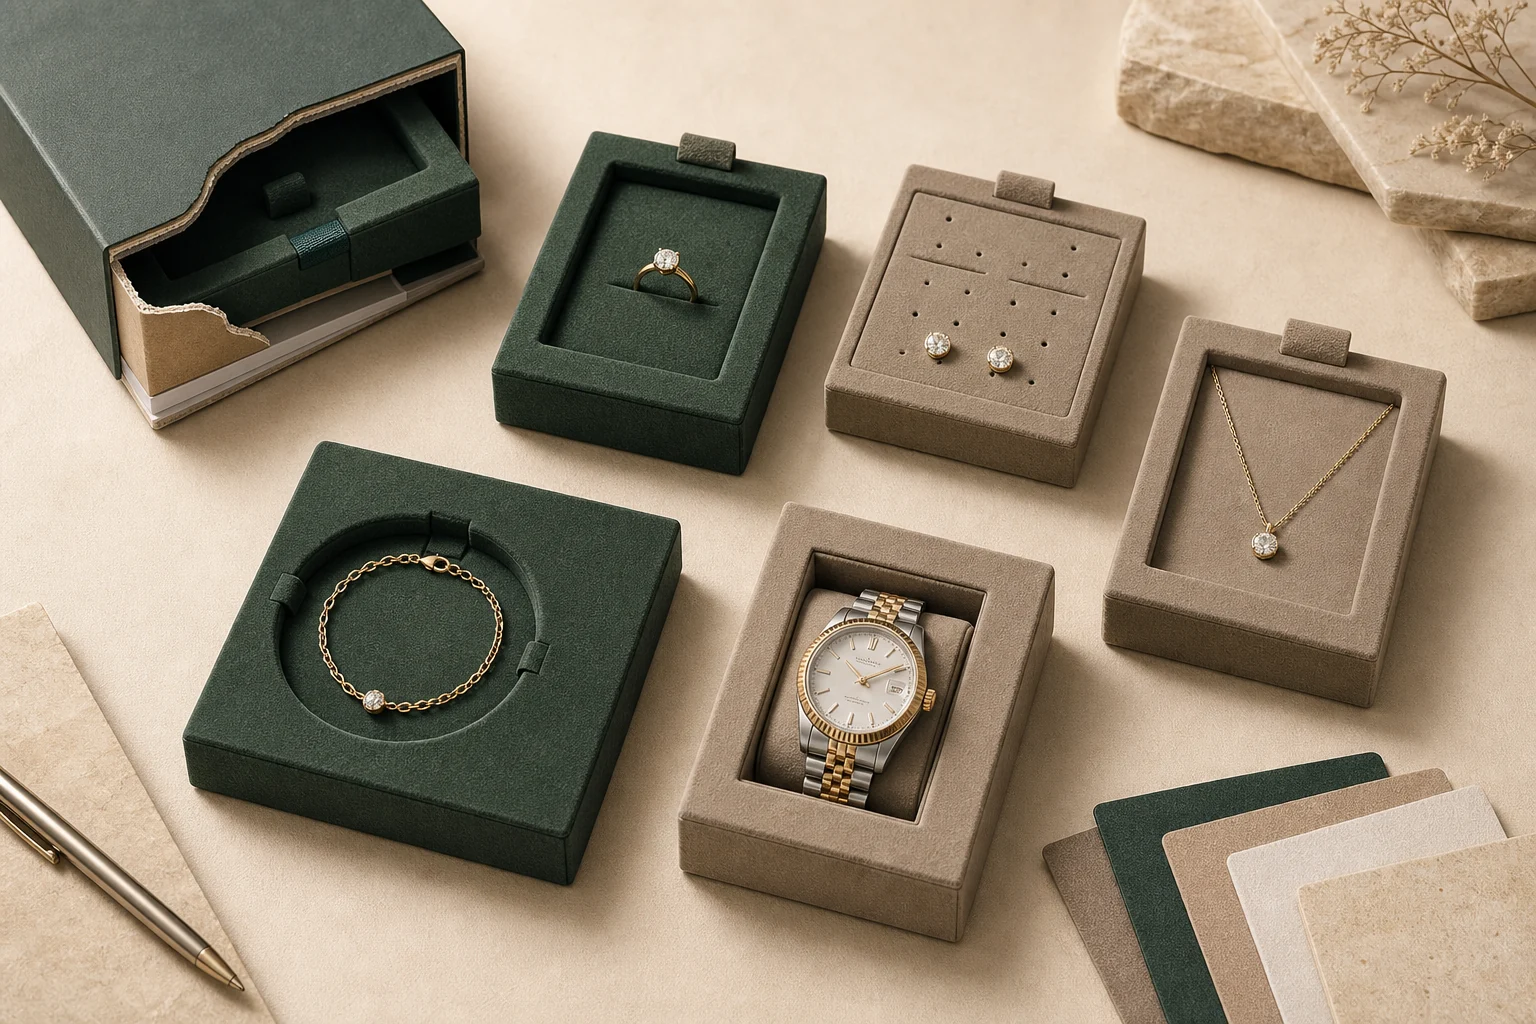
A jewelry packaging insert is successful only when it presents the piece clearly, holds it through normal handling and lets the customer remove it without damage or frustration. This guide explains how buyers can turn jewelry dimensions and presentation goals into a practical insert brief, then approve a physical sample with repeatable checks.
Start with the jewelry, not an empty box
Insert development should begin with the product that will be packed. The outside dimensions of the box matter, but the critical information is the jewelry’s shape, weight, delicate areas, attachment points and intended viewing angle. A ring with a high setting needs different lid clearance from a flat band. Stud earrings need space behind the card for posts and backs. A pendant needs chain control as well as a centered front view.
Send the actual jewelry when practical. When that is not possible, provide verified measurements, clear photographs from several angles and a drawing that identifies the largest and most delicate areas. A generic product category such as “necklace” or “bracelet” is not enough for final fit approval because pieces within the same category can have very different proportions.
Hold
Define where the insert should contact the piece and how firmly it should resist movement.
Clear
Leave controlled space around settings, stones, clasps, posts, crowns and other raised details.
Release
Make the removal path easy to understand without forcing, bending or pulling the jewelry.
Measurements that influence insert fit
Record the dimensions that affect both the visible presentation and the concealed holding method. Use the same units throughout the brief. If the packaging must cover a product range, identify the smallest and largest pieces instead of submitting only an average size.
| Rings | Band width, setting height, largest stone dimensions, single or paired presentation, and the preferred viewing angle. |
|---|---|
| Earrings | Stud, hook or hoop format; overall length and width; post length; back size; and space required behind the insert. |
| Necklaces | Chain length, pendant dimensions and weight, clasp size, desired pendant position, and the amount of chain that must be concealed. |
| Bracelets | Full length, clasp and charm depth, flexible or rigid construction, and whether the piece should lie flat or wrap around a cushion. |
| Watches | Case diameter and height, lug-to-lug length, crown position, strap or bracelet range, and any accessory included in the set. |
These product measurements must be checked against the usable inside space of the selected package. Review our custom jewelry insert options together with the intended custom jewelry box format rather than treating the insert as an isolated component.
Choose the holding method around real use
The best layout is not simply the one that looks neat in a rendering. Consider how packing staff will install the jewelry, how the package may be carried, how the customer will open it and whether the piece will be returned to the box for storage.
- Slots and cuts: useful when the position is predictable, but their width, depth and edge finish must match the jewelry.
- Tabs and concealed channels: can control chains while keeping excess length out of view.
- Cushions: should compress enough for installation while remaining appropriately sized for a watch, bangle or bracelet.
- Cards and removable pads: need enough stiffness for handling and enough clearance inside the outer box or pouch.
- Multiple-piece layouts: require balanced spacing and separate checks for every item, including the path used to remove one piece without disturbing another.
The surface covering also changes how an insert behaves and how the jewelry appears. Velvet, microfiber, paper and other coverings differ in texture, thickness and color response. Compare the proposed insert with the selected packaging materials and finishes before the approval sample is finalized.
A practical sample approval sequence
- Confirm the sample identity. Record the box size, insert construction, covering material, color and sample version before testing.
- Install the actual product. Use the smallest and largest pieces when one insert is expected to cover a range.
- Check the first view. Confirm alignment, spacing, logo relationship and whether the jewelry sits at the intended angle.
- Close the package. Look for contact with the lid or lining, pressure on stones and raised parts, and movement when the box is gently handled in its normal orientation.
- Remove and replace the jewelry. Check that the release point is accessible and that normal removal does not snag a chain, bend a post or place excessive force on a strap.
- Pack the complete set. Include cards, pouches, ribbons, bags and delivery protection that will be used with the finished packaging.
- Document the approval. Keep the physical reference and a written record of dimensions, materials, color, logo, insert layout, accessories and individual packing.
This sequence supports the wider custom packaging development process. If any item changes after approval, identify the new sample version and the exact decision that was revised.
Common fit problems to catch before bulk production
The jewelry moves after the lid is closed
Movement may come from an oversized slot, insufficient holding tension, a cushion that does not match the product or too much unused internal space. Test the package in the orientation in which it will normally be carried, while avoiding unrealistic abuse tests that were never part of the brief.
A raised detail touches the lid
Check setting height, pendant thickness, watch crown position and any decorative element that rises above the main product plane. Clearance should be confirmed with the actual closed structure, including the lid lining.
The front looks correct but packing is difficult
A tight slot or concealed fastening point may create a clean presentation while slowing daily packing or risking damage. Ask the people who will pack the product to test installation and removal during approval.
One sample cannot represent the full assortment
If a single insert is expected to fit several products, test the complete size range. When the differences are too large, a small family of related inserts may provide more reliable fit while preserving a consistent box, color and logo system.
What the approval record should contain
Photographs are helpful, but they do not replace measurements or material references. A useful production record makes the accepted result identifiable for both final checks and future repeat orders.
| Structure | Inside and outside dimensions, board or body construction, lid style and usable internal depth. |
|---|---|
| Insert | Base material, covering, cuts, slots, tabs, cushion size, holding points and product orientation. |
| Appearance | Approved color or physical reference, visible texture, logo method, logo size and placement. |
| Function | Product range tested, accepted holding force, clearance points, removal method and included accessories. |
| Packing | Individual protection, component sequence, quantity per carton and marks required for the destination. |
Use the record as part of the broader jewelry packaging quality-control plan. Inspection should compare finished packaging with the identified approval reference instead of relying on memory or a digital image alone.
Information to include in an insert RFQ
- Jewelry type, verified dimensions and photographs or physical samples.
- Required box, pouch, card or display format and available inside dimensions.
- Preferred presentation angle and any details that must remain visible.
- Material and color direction for both the insert and outer package.
- Logo artwork, intended logo method and branding location.
- Target quantity by item, destination country and required timing.
- Which decisions are fixed and which options should be compared during development.
A complete brief makes sample feedback more specific and makes supplier quotations easier to compare. If some technical decisions remain open, describe the intended use and the trade-off you want the supplier to evaluate. You can send a custom jewelry packaging brief with the information available today.
Build a size-family approval matrix for the full collection
Approving one attractive sample does not establish fit for every piece that will use the insert. Before bulk approval, group the collection by the geometry that changes the fit: the highest setting, widest pendant, longest earring post, largest clasp or heaviest item. Use the matrix to choose representative pieces rather than selecting only the easiest product to pack.
Give each jewelry item, insert and box version a reference code. For each combination, record the holding point, critical clearance, chain or strap routing, closure behavior and removal result. A color change alone may not require a new fit design, but a different lining, fabric thickness or insert construction should be reviewed for its effect on the approved combination.
Choose samples that challenge the design
- Small end of the range: check that the piece remains centered and does not disappear into an opening or move out of its intended presentation position.
- Large end of the range: check closure without forcing the lid, contact around raised settings and pressure on delicate features.
- Awkward geometry: check asymmetric pendants, long posts, flexible chains and protruding clasps using the intended packing route.
- Complete set: include cards, care information, pouches and other components that occupy space in the finished package.
- Removal: ask someone unfamiliar with the sample to remove and replace the piece. Record confusing pull directions or places where a fingernail or tool is needed.
Approve a repeatable packing sequence
Write a short sequence for the person packing the order. State which item goes in first, where excess chain is held, how backs or clasps are positioned and which surfaces should remain untouched. Photograph the front and hidden side of the approved arrangement. A clear back view can be more useful than another presentation rendering when chain routing or earring clearance is the problem.
Run the sequence using the intended jewelry, not a lighter substitute. Check that the operator can achieve the arrangement without bending a post, dragging a chain across a finish or stretching the holding slot beyond the accepted condition. If the sequence relies on a temporary packing aid, identify whether it is removed before delivery.
Separate fit approval from distribution protection
The insert trial establishes presentation, retention and removal for the combinations tested. It does not establish parcel performance. If the package will be shipped, review the entire packed product and distribution route separately. ISTA’s design and testing guidance connects test selection to the actual distribution environment and calls for damage criteria to be defined before testing. A normal-handling sample review should not be described as ISTA certification.
Close the approval with clear boundaries
List approved combinations, unresolved combinations, accepted photographs and the sample revision. Identify who can authorize a change. Keep one approved reference sample where practical and record any later change to the jewelry or packaging that requires another fit check. An unresolved oversized piece should remain visible in the matrix, rather than being treated as approved because the smaller items passed.
Use the packaging RFQ checklist to include the sample matrix in your inquiry, then request an insert and box review. For direct-to-customer orders, continue with the complete parcel planning guide.
Frequently asked questions
Can a custom insert be developed without the physical jewelry?
Verified drawings and measurements can support an initial concept, but a real piece or an agreed physical reference is strongly preferred for final fit approval.
Should one insert fit every product in a collection?
Only when the full size range can be held, cleared and removed reliably. Related insert sizes can preserve a consistent packaging family when product dimensions vary too widely.
Is a digital rendering enough to approve the insert?
No. A rendering can confirm direction and layout, but physical fit, surface behavior, lid clearance and removal should be checked on a representative sample.
What should be rechecked after an insert revision?
Repeat product installation, first-view alignment, closure clearance, normal handling, removal and complete-set packing. Update the written approval record to identify the accepted version.